DJMP-007 — Complete User Guide (HOW TO)
Direct, practical step-by-step instructions for operating the DJMP-007 flagship multiplayer on stage. From club mixer wiring and library hygiene to AI stems and MPAirLinkDJ wireless sync.
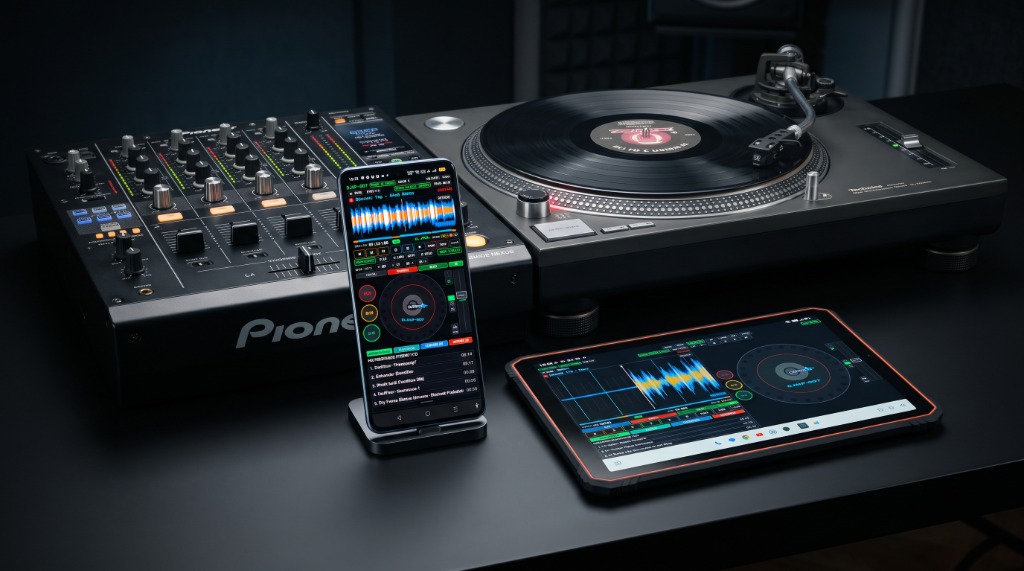
How to Connect Phone / Tablet to a DJ Club Mixer (Club Setup)
A pristine audio chain ensures zero noise, maximum dynamic headroom, and complete mixer-level control:
- USB-C Adapter with Power Delivery (PD): Connect a USB-C adapter that splits the port into an audio output and charging power (min. 18W–30W). This keeps the device at 100% battery throughout a multi-hour performance.
- 3.5mm Jack to 2x RCA Cable: From the headphone output of the adapter, run a stereo cable into the LINE input of your club mixer (e.g. mikser estradowy, Allen & Heath Xone). Never connect to a PHONO turntable input!
- Android Output Volume Level: Set Android media volume to approx. 85–90% (not 100%, avoiding DAC saturation on the adapter). Control the signal level using the channel GAIN / TRIM knob on your mixer.
- USB Audio Interface (UAC2 Class Compliant): DJMP-007 natively supports professional USB audio interfaces via USB-OTG (e.g. Focusrite Scarlett, Audioengine, iFi). The Oboe engine automatically recognizes 24-bit / 96kHz converters.
How to Access Options & Settings (OPTIONS)
Platter mechanics, Pitch Fader sensitivity, audio buffer configuration, and visual appearance:
- OPTIONS Button: Located in the top section of the interface (next to the library icon and BPM display). A single tap opens the settings modal.
- JOG & Fader Mechanics: Smooth platter sensitivity (0.2x – 3.0x), left-handed platter flip (Left-Handed Jog Layout), and tempo slider precision (from ultra-fine to fast leaps).
- Visual Personalization: Dark / Light mode switching, accent LED palette selection (Emerald, Cyan, Amber, Performance Red, Neon Violet), and custom vinyl slipmat artwork loading.
How to Change Waveform Zoom and Navigate Tracks
Microscopic precision over the audio timeline and vector waveform ribbon:
- 4-Stage ZOOM Selector: Tap the ZOOM label on the LCD screen to cycle through scales: FULL (entire track overview with 16-bar phrase grid) → 1X (~8 seconds) → +15% → +25% (microscopic precision for scratching and pinpoint drop positioning).
- Fast Needle Search: Tap or drag across the bottom static overview strip to instantly drop the playhead needle at any position in the song.
- Waveform Dragging: Dragging your finger across the main vector waveform executes fluid scratching / nudging in pause or play state.
How to Monitor Track Timing (REMAIN / ELAPSED / BRIDGE)
Adapt timeline telemetry to your performance workflow:
- TIME Button: Cycles counter modes: REMAIN (time remaining to track end, negative values) ↔ ELAPSED (elapsed playback time from the start).
- BARS Button (Phrase Telemetry): Cycles bar countdown: BARS TO CALM (counts bars and beats to the next breakdown / beat drop) ↔ BARS TO CUE (bars remaining to the closest Hot Cue marker A–F) ↔ OFF.
- BPM Multiplier Badge (1X / 2X): Tap the tempo badge to toggle half/double tempo display (e.g. drum & bass 87 BPM ↔ 174 BPM) without altering audio playback speed.
How to Use Beat Jump and Beat Loops
Instant phrase realignment and energy build-ups:
- Auto Beat Loop: Dedicated 1/2, 1, 2, 4, 8, 16, and 32 bar buttons instantly engage seamless loops locked to the Quantize beatgrid.
- BEAT JUMP: Navigation buttons (« and ») with customizable lengths (4, 8, 16 beats) instantly jump playback forward or backward in absolute phase.
- FAIL-SAFE 16-Beat Emergency Loop: The top-bar FAIL-SAFE button manually or automatically loops the last 16 beats in RAM if a USB drive disconnects or track ends unexpectedly.
How to Set CUE Points and Hot Cues (A–F)
Cue point architecture and instant trigger controls:
- Main CUE Button: In pause, sets the primary downbeat point at current needle position. While playing, immediately stops playback and returns to this point. Holding CUE allows temporary preview.
- Hot Cue Pads (A–F): Tapping an empty pad saves current track position instantly. Tapping an illuminated pad launches playback from that marker with Quantize beat alignment.
- Clearing Hot Cues (CLEAR): Hold the CLEAR button and tap the desired Hot Cue pad to wipe its saved location.
How to Manage JOG Wheel Modes (VINYL vs Multi Player, MOTOR, Sensitivity)
Fine-tune platter response to match your personal mixing style:
- VINYL / Multi Player Switch: In VINYL mode, touching the platter surface stops audio and enables vinyl scratching. In Multi Player mode, the entire platter functions as pitch-bend (nudging).
- Turntable Motor Simulation (MOTOR ON/OFF): Authentic direct-drive 1200 Direct-Drive motor physics: platter inertia, finger drag resistance, dynamic nudging, and realistic coast-down upon stopping.
- Platter Sensitivity: Adjustable in Settings from 0.2x to 3.0x with optional Full Platter Scratch mode.
How to Use TEMPO / PITCH Slider and Configure Precision
Unmatched tempo calibration and adjustment precision:
- Pitch Range (RANGE): Select range: ±4%, ±8%, ±16%, or WIDE (±100%). Enables micro-adjustments accurate to 0.01 BPM.
- Center Zero Lock (Zero Dent): Automatic magnetic lock at 0.00% pitch with LED indicator guarantees instant return to native track speed.
- Left-Handed Layout: Swap JOG platter and tempo slider positions via Settings for ergonomic left-hand scratching.
How Master Tempo and Neural STEMS Isolation Work
Revolutionary real-time 4-channel neural audio engine:
- Master Tempo (Key Lock): The MT button locks the musical key. Changing speed via pitch fader preserves original vocal tone and key.
- STEMS Buttons (VOCAL, DRUMS, BASS, INST): Instant mute or solo extraction of track components in real time using Microsoft ONNX Runtime Mobile models accelerated by ARM NEON SIMD.
- ANC-Grade Vocal Annihilation: Muting vocals completely eliminates voice without residual artifacts through Mid/Side phase correlation matrix math.
How to Batch Analyze Folders and Pre-Cache Tracks (The 10–20 Rule)
The DJMP-007 engine executes real-time and pre-batch analysis (BPM, phrase anatomy, calm breakdown points, beatgrid mapping, and AI neural stem separation).
To ensure peak device performance and protect your storage from running full, it is strictly recommended to divide your music collection into folders of 10 to a maximum of 20 tracks (e.g. by genres, gig sets, or key), rather than dumping hundreds of raw files into a single huge directory.
Why this is essential for your stage setup:
- Storage Protection (Disk Capacity): Every analyzed song generates a companion binary cache file with a
.djmp v7extension directly in that folder. The.djmpfile contains not just metadata and waveform graphics, but decoded PCM buffers and isolated stem layers so that loading any song on stage takes sub-50 ms with zero delay. A single.djmpfile can measure from several dozen to over 100 MB. If a user runs batch analysis on a folder with 200–500 tracks, that directory can consume 15–50 GB of disk space, risking an immediate Storage Full error and slowing down the Android OS. - Processing Time & Thermal Headroom (CPU Throttling): Neural network pre-analysis and the Harmonic Comb Resonator require high DSP/NPU computation. Analyzing a curated folder of 10–20 songs completes swiftly without overheating. Attempting to bulk-analyze 300 tracks at once will peg the CPU for hours, causing battery drain and severe thermal throttling.
Recommended gig preparation workflow:
- Organize audio files on your SD card or phone storage into manageable sets: e.g.
Set_House_Warmup_15,PeakTime_Techno_12,Classics_20. - In DJMP-007, navigate to BROWSE -> + FOLDER and select your designated playlist folder.
- In Settings, trigger folder analysis — the process completes in minutes, leaving you with complete control over storage space.
- Performance on stage: Loading a pre-cached track onto a deck takes 3 milliseconds with 0% CPU consumption — guaranteeing 100% clean, dropout-free audio without glitching!
Connecting & Syncing Multiple Devices with MPAirLinkDJ (Up to 4 Decks)
The MPAirLinkDJ (Multi Player Air Link DJ) system links 2 to 4 independent phones or tablets into an integrated, club-grade multi-player setup operating completely without LAN cables, routers, or external audio hardware mixers.
Step 1: Create a Shared Radio Domain (Zero-Config Wi-Fi)
The app broadcasts peer-to-peer UDP clock packets on port 50007:
- Option A (Recommended for Stage – Zero Router): Turn on Mobile Wi-Fi Hotspot (Tethering) on one of your phones. Connect the other 1, 2, or 3 devices to this hotspot. (Note: Cellular data or internet access is NOT needed — the hotspot acts purely as a ultra-low-latency local wireless bus).
- Option B (Studio / Home): Connect all devices to the same standard Wi-Fi network (2.4 GHz or 5 GHz band).
Step 2: Launch DJMP-007 & Automatic Peer Discovery
- Launch DJMP-007 on all devices.
- The top-bar indicator instantly updates from
LINK: STANDALONEtoLINK: 2 DECKS,LINK: 3 DECKS, orLINK: 4 DECKS. - Peer-to-peer sync negotiation establishes in the background in milliseconds.
Step 3: Assign Player Deck Numbers (DECK 1–4)
- Each device boots with a default deck identity.
- Tap the deck badge on the top bar (e.g. DECK 1) to cycle its identity:
DECK 1→DECK 2→DECK 3→DECK 4. - Each multiplayer in the session must carry a unique deck number.
Step 4: Master Clock Management (MASTER & BEAT SYNC)
- Master Deck Selection (MASTER): On the player currently feeding the live sound system, tap the MASTER button on the top bar (it illuminates in vivid amber/orange). From this moment, this deck provides the master tempo (BPM), beat phase, and beatgrid clock to the entire network.
- Synchronizing Other Decks (SYNC): On the remaining devices, tap SYNC (illuminates in cyan). Decks in SYNC mode automatically lock their tempo and downbeat phase to the MASTER deck. Even if the DJ nudges or rides the TEMPO slider on the MASTER deck, all slave decks track the pitch changes smoothly in real time.
- Smooth Set Handoff: When transitioning into the next song, tap MASTER on the incoming deck — the network clock seamlessly realigns to the new leader, and the previous player drops back into follower status.
How to Adjust Track List Density and Display Size
Optimal library browsing ergonomics across phones and tablets:
- Track List Density Slider: In the BROWSE screen, adjust list scaling between high-density overviews and large, tap-friendly tiles for smartphone touchscreens.
- Portrait & Landscape Support: Fluid responsive layout for both portrait stand mounts and horizontal mixer-adjacent setups.